9.1 Object Detection
TorchVision Object Detection Finetuning Tutorial
Created Date: 2025-06-20
For this tutorial, we will be finetuning a pre-trained Mask R-CNN model on the Penn-Fudan Database for Pedestrian Detection and Segmentation . It contains 170 images with 345 instances of pedestrians, and we will use it to illustrate how to use the new features in torchvision in order to train an object detection and instance segmentation model on a custom dataset.
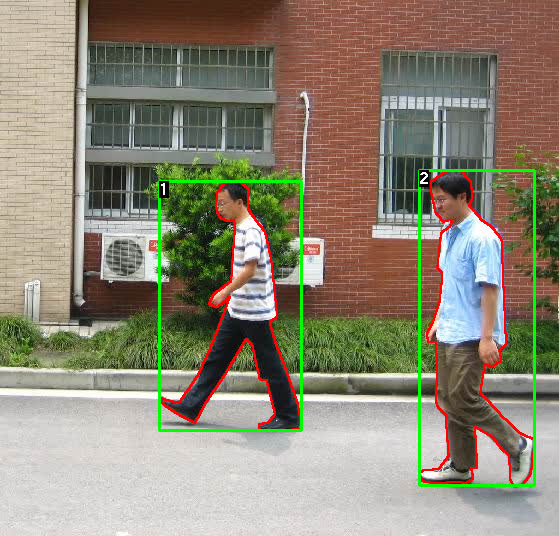
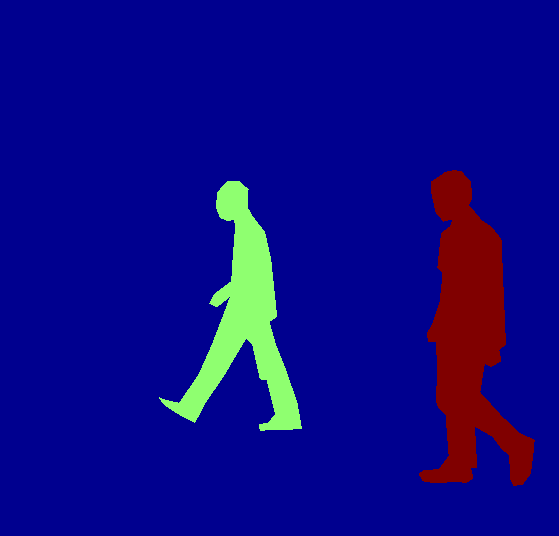
Figure 1 - Sample Image and Labeded Mask
9.1.1 Defining the Dataset
The reference scripts for training object detection, instance segmentation and person keypoint detection allows for easily supporting adding new custom datasets. The dataset should inherit from the standard torch.utils.data.Dataset class, and implement __len__ and __getitem__ .
The only specificity that we require is that the dataset __getitem__ should return a tuple:
image: torchvision.tv_tensors.Image of shape
[3, H, W], a pure tensor, or a PIL Image of size(H, W).target: a dict containing the following fields - boxes, labels, image_id, area, iscrowd and masks.
First, finetunning.py download the dataset and extract the zip file:
file_path = download.download(url,
                              sha1_hash='88474aa75cc41dbb8d3c76d2f3c818e79fa0438d')
print(file_path)

base_name = os.path.splitext(os.path.basename(file_path))[0]
extract_dir = os.path.join(os.path.dirname(file_path), base_name)

with zipfile.ZipFile(file_path, 'r') as zip_ref:
    names = zip_ref.namelist()
    top_level_dirs = {name.split('/')[0] for name in names if '/' in name}
    if len(top_level_dirs) == 1 and base_name in top_level_dirs:
        zip_ref.extractall(os.path.dirname(file_path))
        os.rename(os.path.join(os.path.dirname(file_path), base_name), extract_dir)
    else:
        os.makedirs(extract_dir, exist_ok=True)
        zip_ref.extractall(extract_dir)
We have the following folder structure:
PennFudanPed/
  PedMasks/
    FudanPed00001_mask.png
    FudanPed00002_mask.png
    FudanPed00003_mask.png
    FudanPed00004_mask.png
    ...
  PNGImages/
    FudanPed00001.png
    FudanPed00002.png
    FudanPed00003.png
    FudanPed00004.png
Here is one example of a pair of images and segmentation masks:
image = torchvision.io.read_image(os.path.join(extract_dir, 'PNGImages/FudanPed00046.png'))
mask = torchvision.io.read_image(os.path.join(extract_dir, 'PedMasks/FudanPed00046_mask.png'))

pyplot.figure(figsize=(8, 4))
pyplot.subplot(121)
pyplot.title('Image')
pyplot.imshow(image.permute(1, 2, 0))
pyplot.subplot(122)
pyplot.title('Mask')
pyplot.imshow(mask.permute(1, 2, 0))
pyplot.show()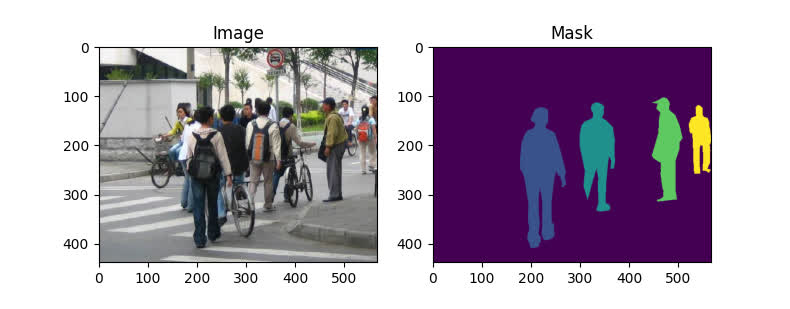
Figure 2 - FudanPed Random Sample
So each image has a corresponding segmentation mask, where each color correspond to a different instance. File penn_fundan_dataset.py write a torch.utils.data.Dataset class for this dataset. In the code below, we are wrapping images, bounding boxes and masks into torchvision.tv_tensors.TVTensor classes so that we will be able to apply torchvision built-in transformations (new Transforms API) for the given object detection and segmentation task.
Namely, image tensors will be wrapped by torchvision.tv_tensors.Image, bounding boxes into torchvision.tv_tensors.BoundingBoxes and masks into torchvision.tv_tensors.Mask. As torchvision.tv_tensors.TVTensor are torch.Tensor subclasses, wrapped objects are also tensors and inherit the plain torch.Tensor API. For more information about torchvision tv_tensors see this documentation .
import os
import torch

from torchvision.io import read_image
from torchvision.ops.boxes import masks_to_boxes
from torchvision import tv_tensors
from torchvision.transforms.v2 import functional as F


class PennFudanDataset(torch.utils.data.Dataset):
    def __init__(self, root, transforms):
        self.root = root
        self.transforms = transforms
        # load all image files, sorting them to
        # ensure that they are aligned
        self.imgs = list(sorted(os.listdir(os.path.join(root, "PNGImages"))))
        self.masks = list(sorted(os.listdir(os.path.join(root, "PedMasks"))))

    def __getitem__(self, idx):
        # load images and masks
        img_path = os.path.join(self.root, "PNGImages", self.imgs[idx])
        mask_path = os.path.join(self.root, "PedMasks", self.masks[idx])
        img = read_image(img_path)
        mask = read_image(mask_path)
        # instances are encoded as different colors
        obj_ids = torch.unique(mask)
        # first id is the background, so remove it
        obj_ids = obj_ids[1:]
        num_objs = len(obj_ids)

        # split the color-encoded mask into a set
        # of binary masks
        masks = (mask == obj_ids[:, None, None]).to(dtype=torch.uint8)

        # get bounding box coordinates for each mask
        boxes = masks_to_boxes(masks)

        # there is only one class
        labels = torch.ones((num_objs,), dtype=torch.int64)

        image_id = idx
        area = (boxes[:, 3] - boxes[:, 1]) * (boxes[:, 2] - boxes[:, 0])
        # suppose all instances are not crowd
        iscrowd = torch.zeros((num_objs,), dtype=torch.int64)

        # Wrap sample and targets into torchvision tv_tensors:
        img = tv_tensors.Image(img)

        target = {}
        target["boxes"] = tv_tensors.BoundingBoxes(boxes, format="XYXY", canvas_size=F.get_size(img))
        target["masks"] = tv_tensors.Mask(masks)
        target["labels"] = labels
        target["image_id"] = image_id
        target["area"] = area
        target["iscrowd"] = iscrowd

        if self.transforms is not None:
            img, target = self.transforms(img, target)

        return img, target

    def __len__(self):
        return len(self.imgs)
That’s all for the dataset. Now let’s define a model that can perform predictions on this dataset.
9.1.2 Defining your model
In this tutorial, we will be using Mask R-CNN, which is based on top of Faster R-CNN. Faster R-CNN is a model that predicts both bounding boxes and class scores for potential objects in the image.
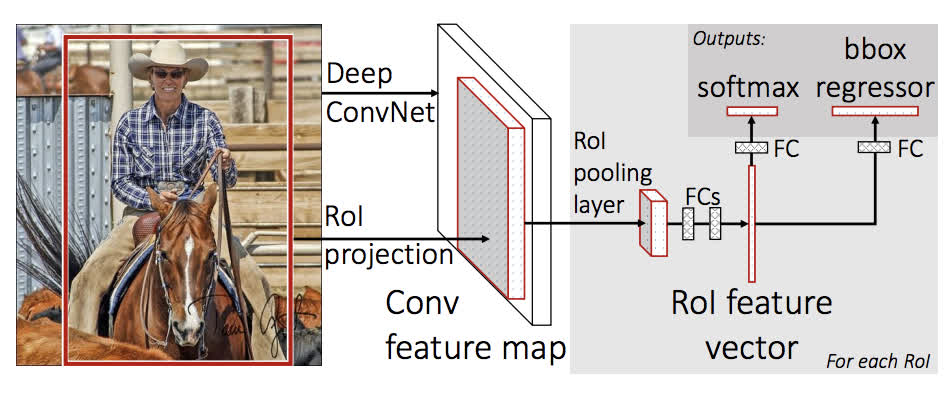
Figure 3 - Faster R-CNN Architecture
Mask R-CNN adds an extra branch into Faster R-CNN , which also predicts segmentation masks for each instance.
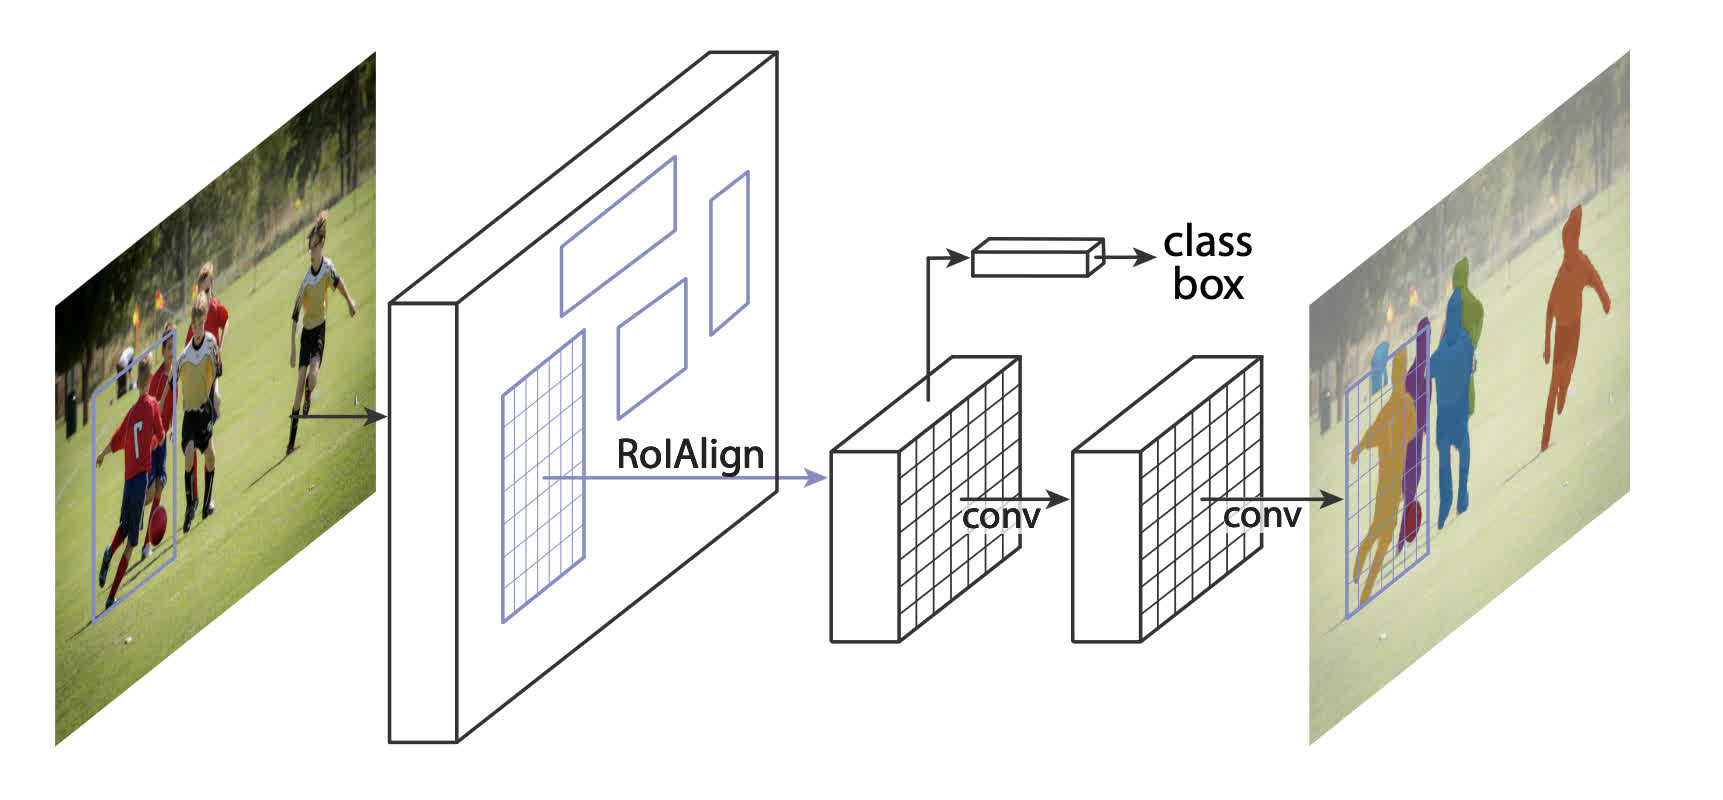
Figure 4 - Mask R-CNN Architecture
There are two common situations where one might want to modify one of the available models in TorchVision Model Zoo. The first is when we want to start from a pre-trained model, and just finetune the last layer. The other is when we want to replace the backbone of the model with a different one (for faster predictions, for example).
Let’s go see how we would do one or another in the following sections.
9.1.2.1 Finetuning from a Pretrained Model
Let’s suppose that you want to start from a model pre-trained on COCO and want to finetune it for your particular classes. Here is a possible way of doing it:
# load a model pre-trained on COCO
model = torchvision.models.detection.fasterrcnn_resnet50_fpn(weights="DEFAULT")

# replace the classifier with a new one, that has
# num_classes which is user-defined
num_classes = 2  # 1 class (person) + background
# get number of input features for the classifier
in_features = model.roi_heads.box_predictor.cls_score.in_features
# replace the pre-trained head with a new one
model.roi_heads.box_predictor = torchvision.models.detection.faster_rcnn.FastRCNNPredictor(in_features, num_classes)
9.1.2.2 Modifying the Model to Add a Different Backbone
9.1.2.3 Model for PennFudan Dataset
9.1.3 Putting Everything Together
9.1.4 Testing forward() method (Optional)
9.1.5 Wrapping up
In this tutorial, we have learned how to create own training pipeline for object detection models on a custom dataset. For that, we wrote a torch.utils.data.Dataset class that returns the images and the ground truth boxes and segmentation masks. we also leveraged a Mask R-CNN model pre-trained on COCO train2017 in order to perform transfer learning on this new dataset.